
We have been making these ornaments for the last five years, and by "we" I mean my children and I.
The first year the age range was 5,3, and 6 months... and now this year the ages are 10,8,5, and 3... just to show you that even the little ones (with some help) can make these ornaments, and they always turn out beautiful.
I have been asked how we make these, and what we use, so many times. I always explain the process and products, and for the last few years I have promised a tutorial on this blog.
So... finally... here it is...
: : Beautiful Metallic Clay Ornaments to make with Children : :
*children not required
What you need to get started:
-Oven bake clay (we use sculpey original oven bake clay : : link here)
-A rolling pin
-Some sort of protective surface: a cutting board with wax paper, place mats. We have a couple place mats that we save just for our ornament making.
-Christmas shaped cookie cutters (or any shape really... hearts would be cute)
-A straw
-Something to make texture: We use these rubbing plates, but i really like these ones and these too. In the past we would just use whatever... strings of beads, pinecones, etc, etc... just look around and get creative.
-A paintbrush (one that could get ruined)
-Jacquard pearl-ex pigments : : find them here : : the colors we have are brilliant gold, spring green, red russet, and antique bronze. We have the 3 gram size of each and they have lasted us all five years with plenty left (except the green because it was spilled last year)
-Narrow ribbon or string
Now... lets get started...

1. The clay is very hard when you take it out of the package so you need to knead it until it gets nice and soft. Then you roll it out. I try to keep it around a quarter to a half inch thick. Although, the thickness really doesn't matter much... just not too thin or too thick... I think you'll know.
We use sculpey original oven bake clay (find it here).

2. Then you choose your cookie cutter and cut out your shape


3. Use your straw to punch a hole for your string
4. Create texture on your ornament. I used the rubbing plate above (find our set here) and just pressed it into the clay. You can find some wonderful rubbing plates here and here. Also, you can use anything to create texture on your ornaments. Our first two years we would walk around the house and collect anything we thought would make a great texture (one of our favorites was a string of beads and a prickly toy, for example)... and of course at this point in the process you can start over if you really don't like the way your texture turned out.
note: I let the kids knead the clay, then I usually roll it out, they cut their shape and punch their hole, and choose their own texture and press it into the clay

5. Protect your surface... we have a little place mat dedicated to ornament painting but for this tutorial I used wax paper on my cutting board and it worked very well.
6. "Paint" your ornament. I have a couple rules for this with the kids. They only get to pick two colors (any two colors they blend look beautiful, but when they would use all of them it would start to look a little wonky (in my opinion). also, I dip the brush for them... with this pigment... a little goes a long long way.
These are jacquard pearl-ex pigments (find them here).

Above the ornament has the russet red and below the antique bronze was painted over it.

7. Place your ornaments on a cookie sheet and bake them in the oven according to the directions on your oven bake clay box. The instructions on my box say to bake them at 275 F (130 C) for 15 minutes per quarter inch of thickness.
All of the ornaments pictured below were made by my little girls....
ages 8, 5, and 3.


8. After your ornaments are baked and cooled you add a pretty ribbon or string and I always write the name of the child that made the ornament and the year in permanent marker on the back.

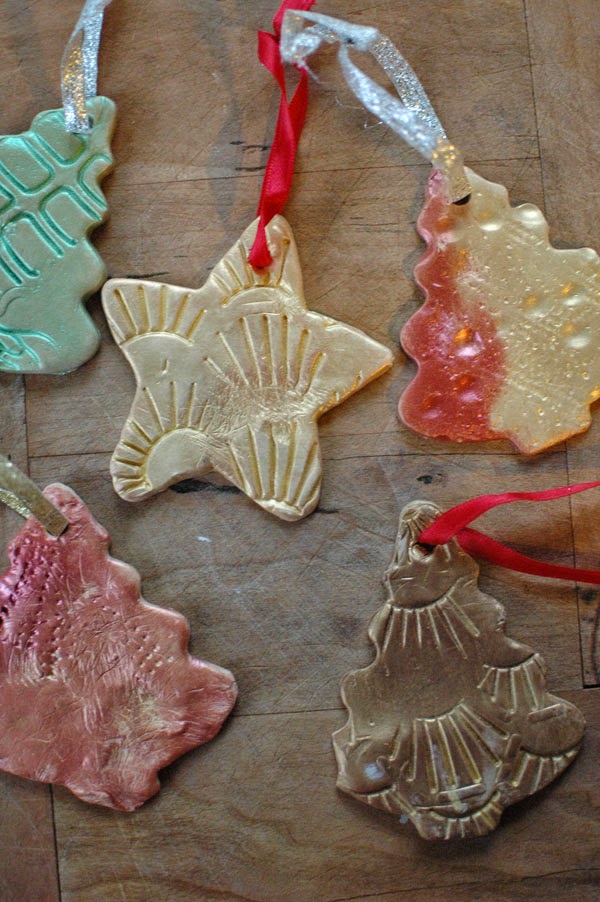
As you can see... each one turns out just a bit different... and all of the imperfections just add to their beauty.
I would love to hear your thoughts and will answer any questions right here in the comments.
Happy making friends!
Those are beautiful. Thanks for sharing the how to, might have to give them a try.
ReplyDeleteEnjoy your weekend.
i love this, we've always done salt dough but i am tired of it ~ and we need a new ornament idea. they turned out great.
ReplyDeletethank you so much!
ReplyDeleteEllie and I followed your tutorial and made these darling ornaments. I couldn't get the pigment in time so we painted on top of the baked ornaments with acrylic paint. They certainly didn't come out as lovely as yours, but they are darling just the same. Thank you for the tutorial. Next year I'll make sure to buy pigment in advance. ;)
ReplyDeleteXoxo!!
yay summer!!! so glad you tried them :) can't wait to see how they turned out.
ReplyDelete